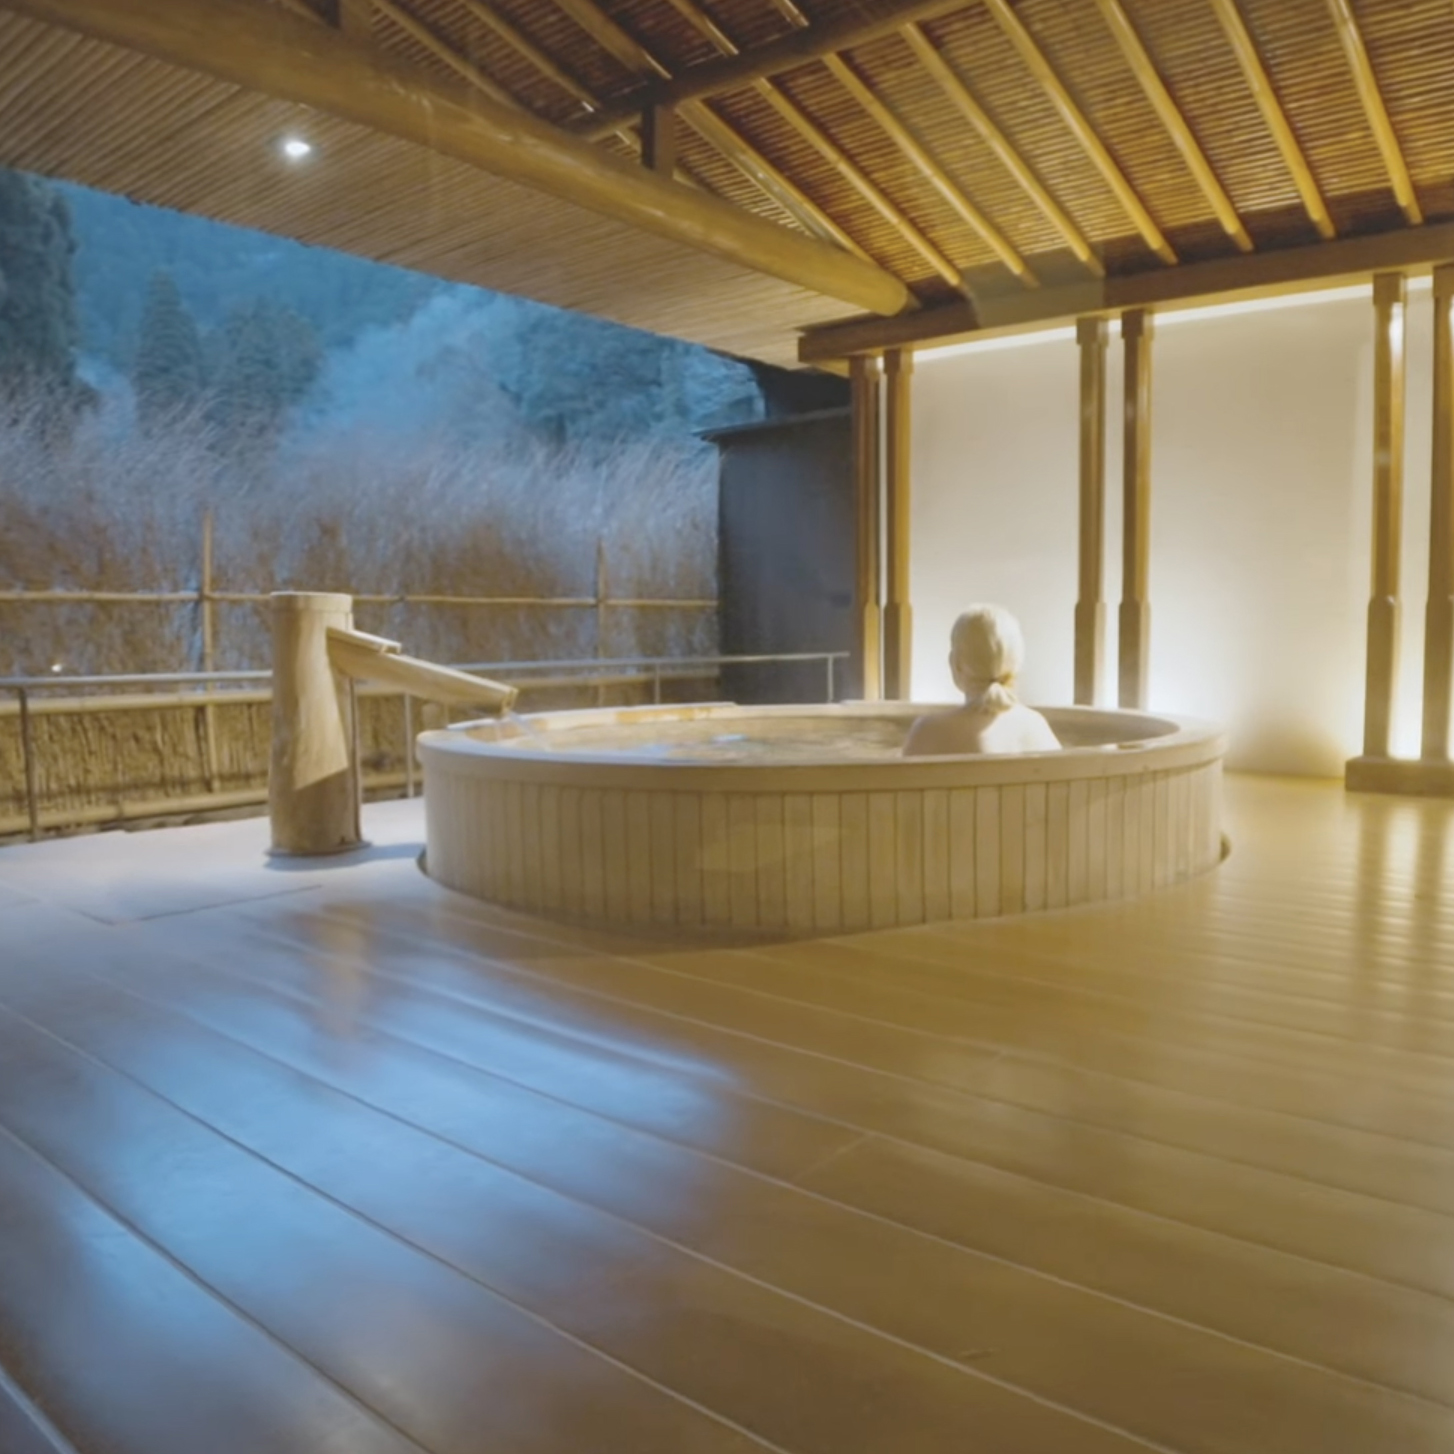
Visit Kinosaki Onsen for the best yukata experience in Japan
Immerse yourself in onsen culture and admire the town’s olden day atmosphere in yukata
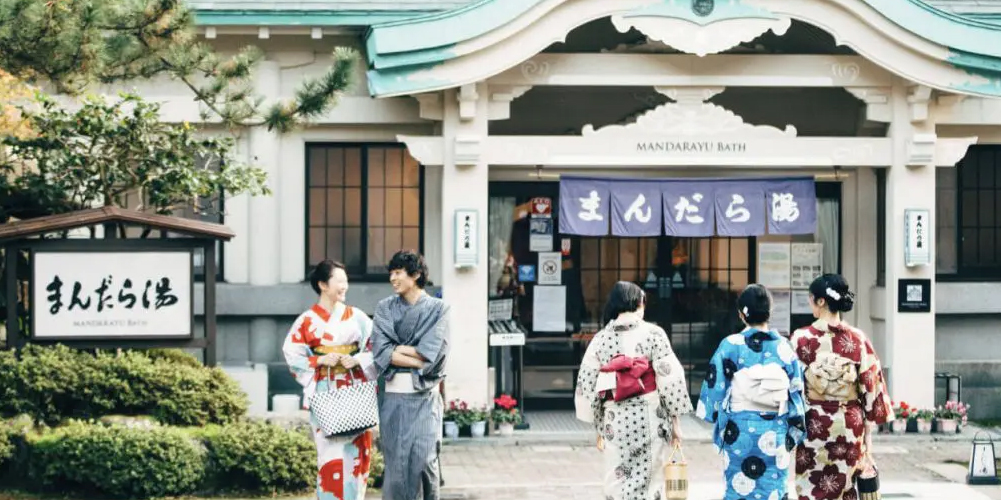
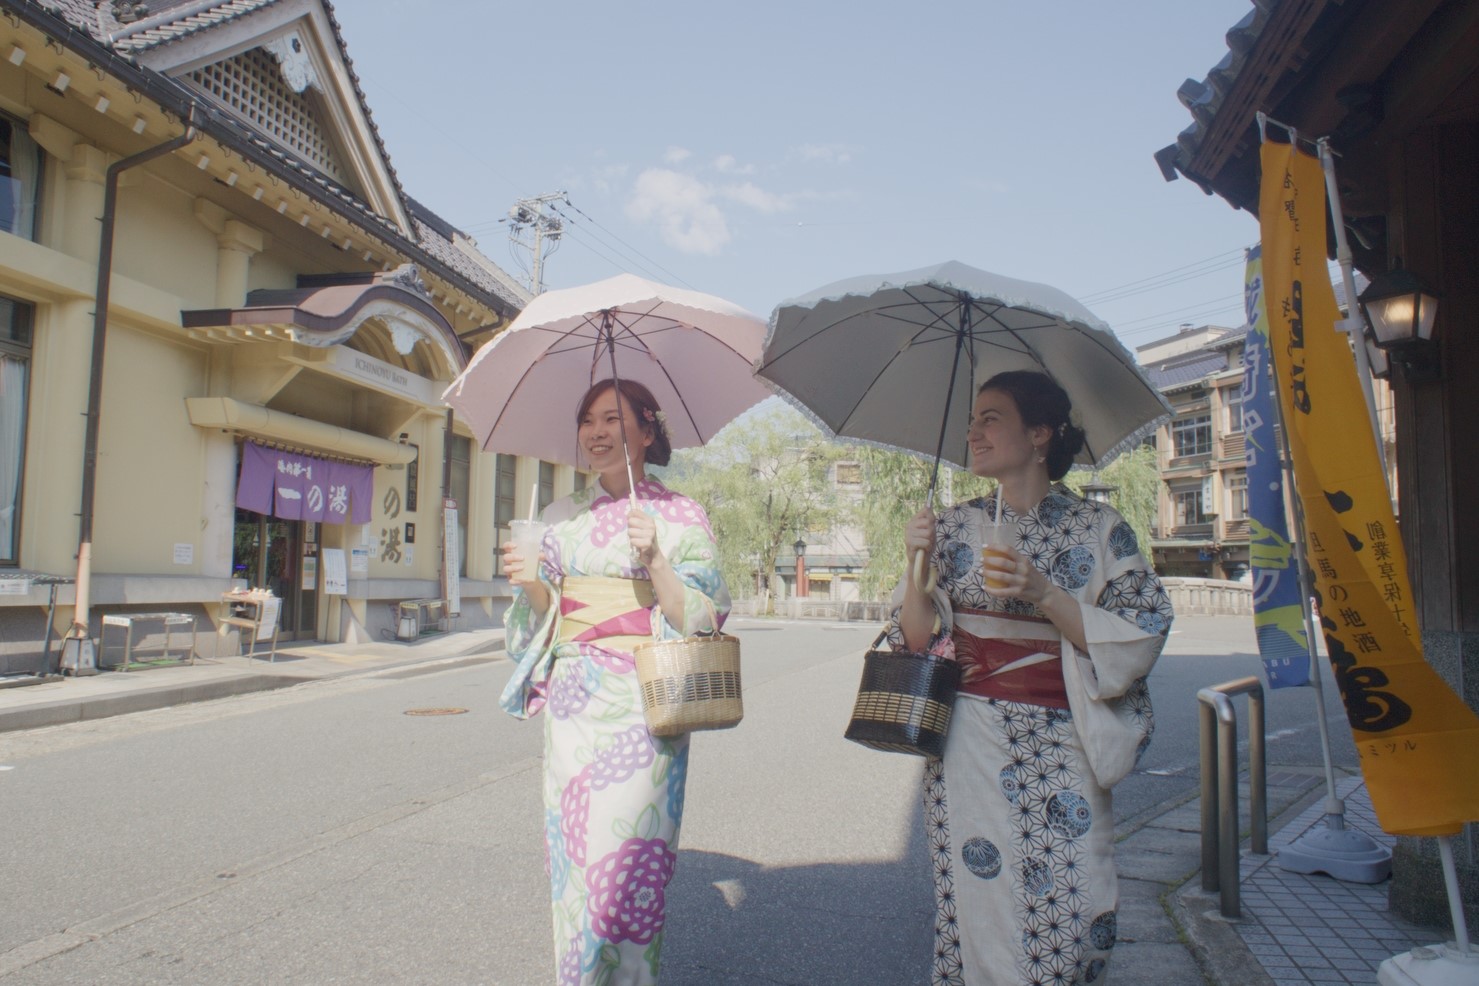
The majority of visitors to Kinosaki Onsen are dressed in yukata. In Kinosaki Onsen, you will feel more than comfortable wearing your yukata around town and in your inn! Join in on the fun and visit local restaurants, go shopping and explore everywhere and anywhere in your yukata! With the canal, stone bridges, sweeping willow trees, and evening lantern glow, yukata add to much of the town’s antiquated atmosphere.
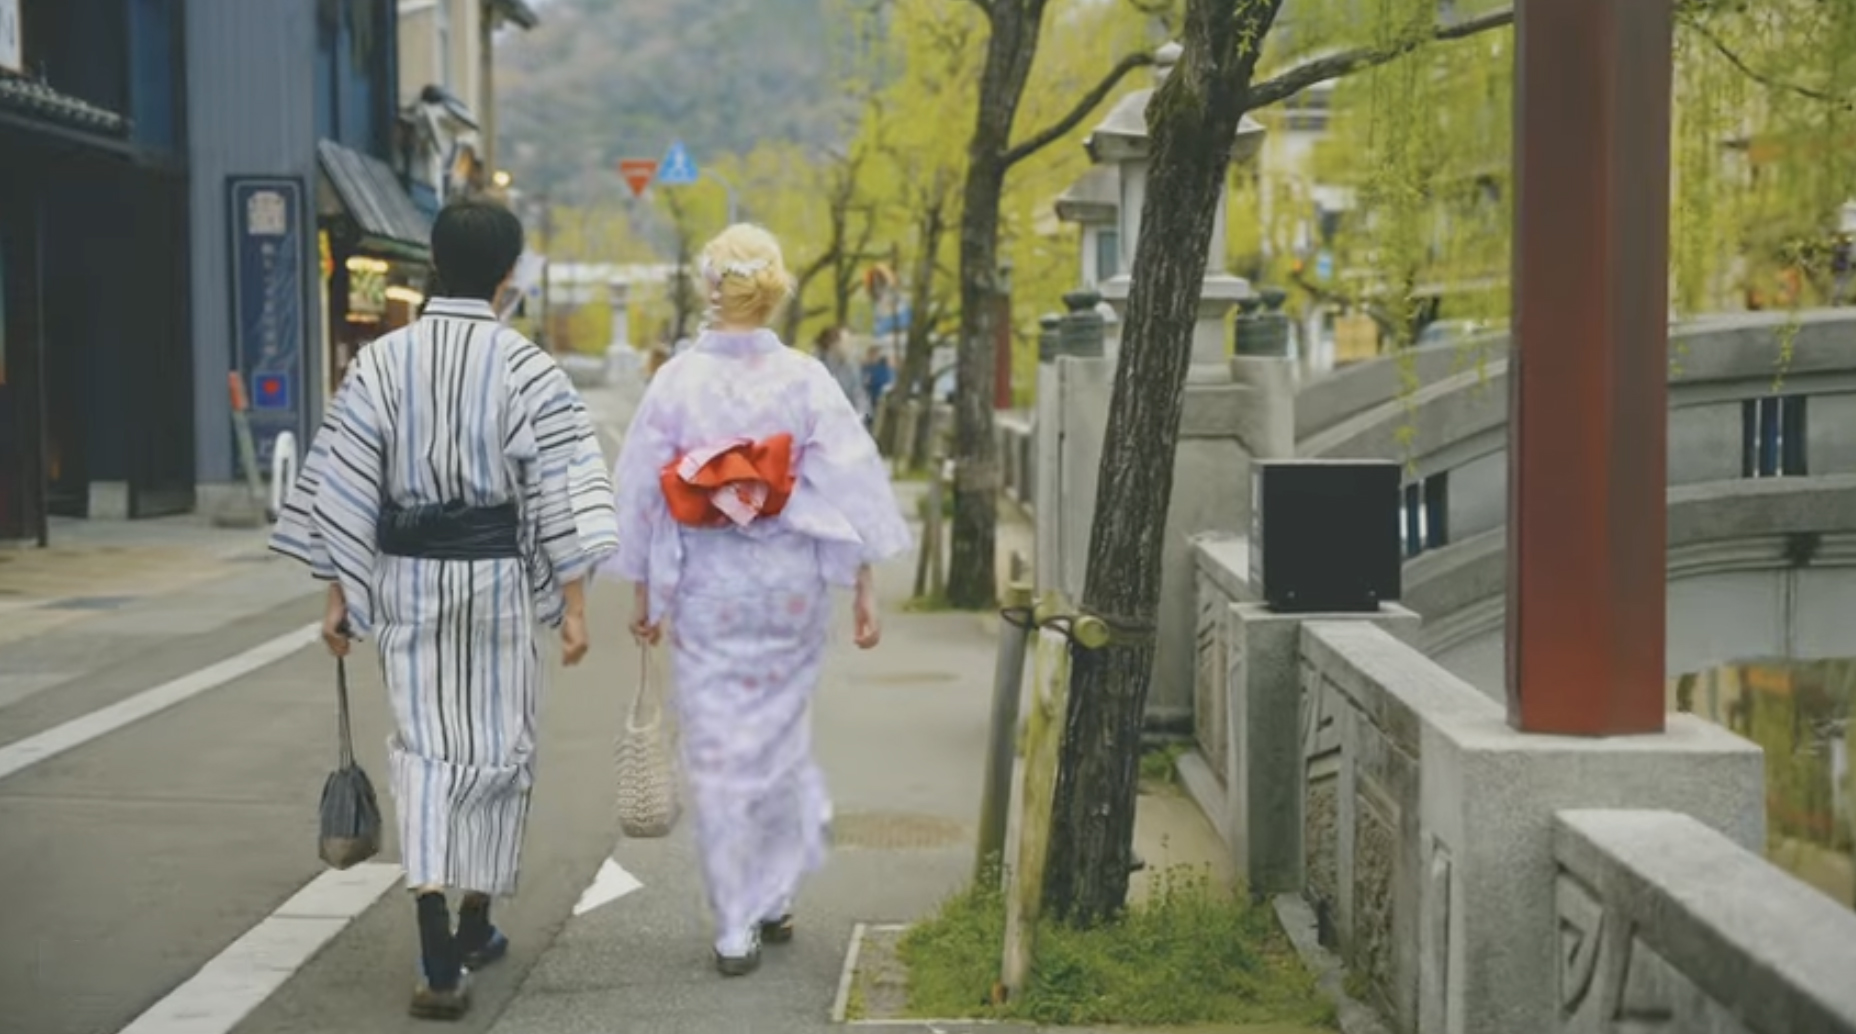
Sights and sounds created by visitors dressed in yukata enhance the charm of Kinosaki Onsen. As they stroll through the streets you will hear the soft hollow “clop” of their wooden sandals or ‘geta.’ Since a large majority of the people in Kinosaki Onsen are dressed in yukata, you will feel as if you are walking through a living history book.
Where can I get a yukata?
Most accommodations, also known as ryokan, in Kinosaki Onsen offer their guests a yukata to wear free of charge during their stay.
If you are only visiting Kinosaki Onsen for the day, there is a great yukata rental shop located in town. IROHA Yukata Shop and Rental offers a wide range of yukata for men, women, and children. Rentals include yukata, geta (wooden sandals), obi (yukata sash), hair arrangement (for the ladies) and assistance putting on the yukata. You can also purchase an entire yukata set!
How to wear a yukata from your ryokan inn
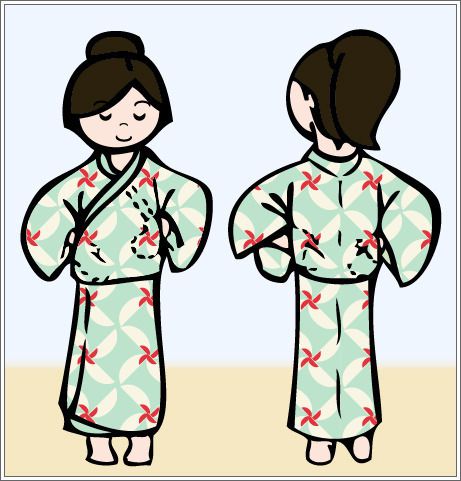
Yukata received from your ryokan inn will most likely have simple patterns and an obi belt that is easy to tie.
-

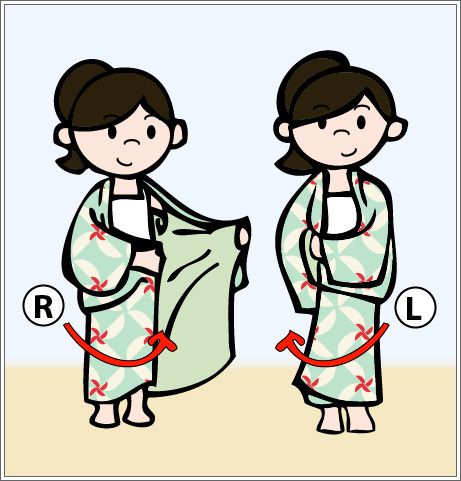
1. Put on the yukata with undergarments worn below.
-
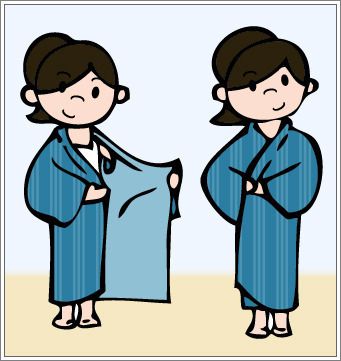
2. Wrap the right side of the yukata around to your left hip. Then wrap the left side over the right. Check the bottom of the yukata to make sure the lengths are even.
-
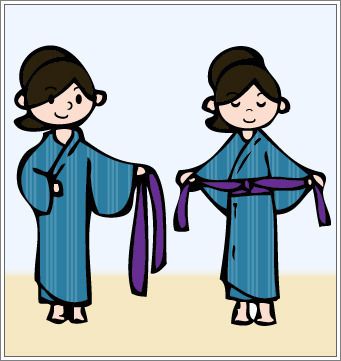
3. Holding the yukata closed, wrap the sash around yourself two to three times. Leave enough length to tie a bow.
*Women: Tie the sash at your waist.
*Men: Tie the sash at your hips. -
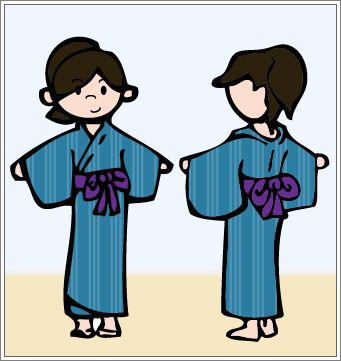
4. Tie the sash into a bow. You can wear the bow in front of you or twist it to the back.
How to wear a “color yukata”
“Color yukata" tend to have more elaborate designs. They also require a few more steps to wear. These are sometimes offered at ryokan inns.
-
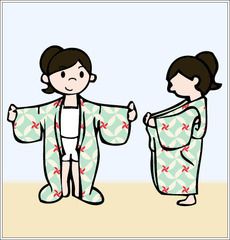
1. Slip on the yukata and take the front of both sides. Pull the yukata out and up in front ofyou. The bottom of the yukata should be just above your ankles.
*It is best to wear undergarments under the yukata. -
2. Keeping the desired length, first wrap the right side of yukata around to your left hip. Then wrap the left side over the top of the right and to your right hip.
-

3. Holding the yukata closed, take the thinner cord and wrap it around your hips, securing the yukata closed. The excess fabric should hang over the cord. Check the bottom of the yukata to make sure the lengths are even.
-
4. Slip your hands through the slits in the yukata. These are where the sleeves meet the body of the yukata. Tighten the top of the yukata around your neck and chest from the inside. Tug the fabric that’s at your waist over the cord so that it lies flat. This will create a fold of fabric that hangs over the cord.
-
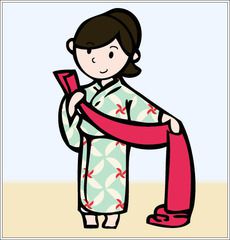
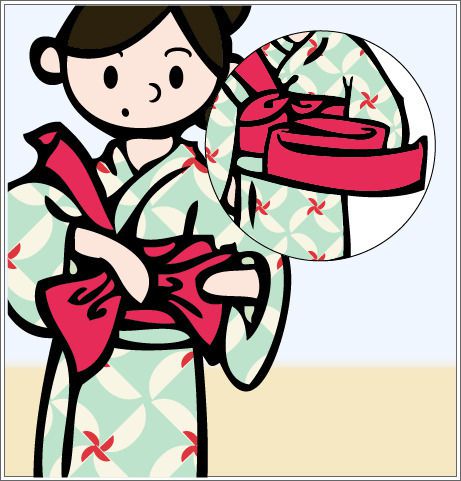
5. Take the sash (obi) and hold it up to your stomach. Take a short length of one end of the sash, about the length from your stomach to just over your shoulder, and fold that in half, leaving the remainder of the sash unfolded. Wrap the unfolded sash around your body, just above your waist.
-
6. Wrap it about 2 times around. Leave some length to make the bow. Tightly tie together the ends of the obi sash. Keep this in front.
-
7. Make an “accordion” fold with the longer end of the obi sash. Then grab and pinch it in the middle.
-
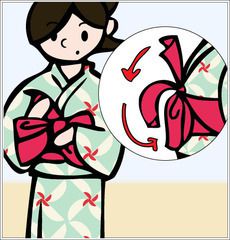
8. Holding the pinched obi sash against your stomach, wrap the other end of the obi sash around the center of the folded bow shaped fabric. Go over and down, then under and up.
-
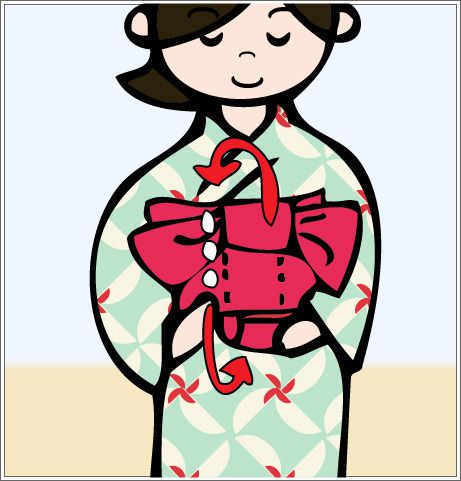
9. Tuck the end under the obi sash that is wrapped around your stomach to hold the bow in place. If some of the obi sash sticks out, tuck it under the obi sash that’s wrapped around the waist.
-
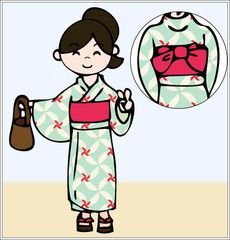
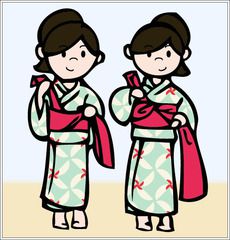
10. Lastly, twist the bow into the back. Grab a bag and pair of geta (Japanese wooden sandals) from the front desk before you go out to complete the look.
Don’t be a victim to yukata fashion faux pas...
-
Do not cross the right side of the yukata above the left. This is how Japanese traditionally dress the dead in yukata.
-

Stay classy. Keep the top of the yukata tightly closed around your neck and chest.
-

Avoid embarrassing exposure. Keep the bottom of the yukata tightly wrapped. If it’s windy, keep one hand on your yukata’s opening.
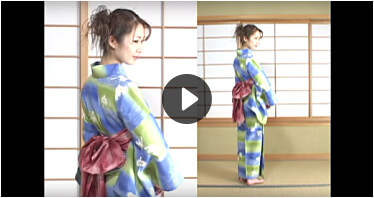
For more information and help on how to wear a yukata, please check out this guidance video. There are step by step instructions in English.
View Video
Kinosaki Onsen is a small town in Japan home to seven tattoo-friendly hot springs. With its nostalgic scenery and atmosphere, it is one of the best towns in Japan to stroll around in a yukata. What better place to wear a yukata than in a hot spring town? Yukata were originally made for the hot springs after all!